Category: How to

  • How To Make Glass In Minecraft: Unleash Your Crafting Skills!

    How To Make Glass In Minecraft: Unleash Your Crafting Skills!

    Are you ready to unleash your crafting skills in Minecraft?

    One essential material that can add a touch of elegance to your builds is glass. With its transparent properties, glass can be used for windows, skylights, and decorative elements.

    In this article, we will guide you through the process of making glass in Minecraft, step by step.

    First, gather the necessary materials, including sand and fuel.

    Next, craft a furnace to smelt the sand into glass.

    Once you have mastered the art of smelting, you can start crafting glass blocks and incorporate them into your builds.

    Whether you are building a modern skyscraper or a cozy cottage, glass can elevate your creations to new heights.

    Get ready to learn some tips and tricks for glass crafting success and let your imagination run wild in the world of Minecraft!

    Key Takeaways

    • Glass is a versatile material that can be used for windows, decorative elements, and building structures in Minecraft.
    • To make glass, players need to gather sand and fuel, and then smelt the sand in a furnace.
    • Glass blocks can be crafted by arranging four pieces of glass in a 2×2 square formation.
    • Glass blocks are transparent and allow light to pass through, making them ideal for windows, greenhouses, and decorative items.

    Gathering the Necessary Materials

    Now that you’ve got your pickaxe, it’s time to gather all the materials you’ll need to create glass in Minecraft.

    To begin, you’ll need to find sand. Look for sandy areas, such as beaches or deserts, as sand is abundant there. Once you have a good amount of sand, equip your pickaxe and start mining. Each block of sand will drop itself when broken, so keep mining until you have enough.

    Next, you’ll need a furnace. Craft one using eight cobblestones and place it down.

    Now, it’s time to smelt the sand. Put the sand into the top slot of the furnace and fuel, such as coal or wood, into the bottom slot. Wait for the sand to smelt into glass, and voila! You’ve successfully collected the necessary materials to make glass in Minecraft.

    Crafting a Furnace

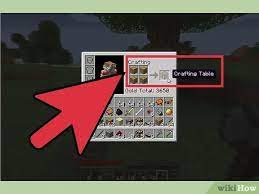
    To craft a furnace, you’ll need to gather the necessary materials. First, you’ll need eight cobblestones. You can easily find cobblestones by mining them with a pickaxe. Once you have the cobblestones, open your crafting table and place them in a square shape, filling up the entire grid. This will create a furnace.

    Next, you’ll need to find some fuel to power the furnace. Common fuel sources include coal and charcoal, which can be obtained by mining coal ore or smelting wood in a furnace. Once you have your furnace and fuel, you can use it to smelt items, including sand to make glass. Simply place the sand in the top slot and the fuel in the bottom slot, and the furnace will do the rest!

    Smelting Sand into Glass

    Once you’ve gathered the necessary materials and have your furnace ready, transform sand into a transparent and delicate substance by smelting it with the power of fuel.

    Begin by collecting sand, which can be found in deserts or beaches. Use your trusty shovel to mine the sand blocks until you have at least four.

    Next, open your furnace and place the sand in the top slot and any kind of fuel, such as coal or wood, in the bottom slot. The furnace will start smelting the sand, and after a short while, it will transform into glass. Remember to keep an eye on the furnace’s progress bar to know when the glass is ready.

    Once the smelting process is complete, you can collect your glass and use it for various purposes, such as building windows or crafting decorative items.

    Enjoy the beauty of your newly created glass!

    Crafting Glass Blocks

    Crafting glass blocks is like piecing together sparkling puzzle pieces to form a luminous and elegant structure. To create these mesmerizing blocks, you’ll need to gather four pieces of glass. Start by opening your crafting table and placing the glass in a 2×2 square formation.

    Once you’ve done this, a glass block will appear in the result box. Simply click and drag the glass block into your inventory, and voila! You’ve successfully crafted a glass block.

    These blocks aren’t just aesthetically pleasing, but they also have practical uses. You can use them to create windows, build greenhouses, or even craft decorative items like glass panes.

    So grab your pickaxe and get ready to showcase your creativity with these stunning glass blocks!

    Using Glass in Building and Decoration

    Glass blocks add a touch of elegance and sophistication to your Minecraft creations. They allow you to transform any ordinary structure into a stunning architectural masterpiece. You can use glass blocks to create windows, skylights, and even entire walls made of glass.

    To place glass blocks, simply select them from your inventory and right-click on the desired location. Glass blocks are transparent, which means they allow light to pass through. This makes them perfect for creating well-lit and airy spaces.

    Glass blocks can also be combined with other materials such as wood or stone to add a unique and stylish touch to your builds. Use glass blocks strategically to create stunning designs and make your Minecraft world truly come alive.

    Tips and Tricks for Glass Crafting Success

    Now that you’ve learned about using glass in building and decoration, it’s time to dive into some tips and tricks for glass crafting success in Minecraft. Whether you’re looking to create magnificent stained glass windows or sleek glass floors, these tips will help you unleash your crafting skills.

    Firstly, always keep a good supply of sand, as that’s the primary ingredient for making glass. Secondly, consider smelting the sand in a furnace rather than a blast furnace, as it’ll yield more glass blocks.

    Additionally, using a silk touch enchanted tool will allow you to harvest glass blocks without breaking them, saving you valuable resources. Lastly, experiment with different dyes to create vibrant colored glass that’ll truly make your creations stand out.

    With these tricks up your sleeve, you’ll be crafting glass masterpieces in no time!

    Frequently Asked Questions

    How long does it take for sand to smelt into glass in a furnace?

    It takes about 10 seconds for sand to smelt into glass in a furnace.

    Can glass blocks be used for anything other than building and decoration?

    Glass blocks in Minecraft can be used for more than just building and decoration. You can also use them to create glass bottles, which are essential for brewing potions.

    Is there a way to speed up the smelting process for sand into glass?

    To speed up the smelting process for sand into glass in Minecraft, you can use a furnace with fuel like coal or charcoal. This will reduce the smelting time and allow you to make glass more quickly.

    Can glass blocks be destroyed or broken easily?

    Yes, glass blocks in Minecraft can be easily destroyed or broken. You can break them by using any tool, including your bare hands. Just punch them and they will shatter.

    Are there any specific tips for creating intricate glass designs in buildings?

    To create intricate glass designs in buildings, experiment with different shapes and patterns. Use glass panes and blocks, combine them with other materials, and play with lighting effects to add depth and visual interest to your structures.

    Conclusion

    So there you have it, you’ve learned how to make glass in Minecraft!

    By gathering the necessary materials, crafting a furnace, and smelting sand, you can create beautiful glass blocks for your buildings and decorations.

    Remember to experiment with different colors and patterns to make your creations truly unique.

    With these tips and tricks, you’ll be a glass crafting expert in no time. So grab your pickaxe and get crafting!

  • How To Make Friends List Private On Facebook

    How To Make Friends List Private On Facebook

    Are you concerned about who can see your friends list on Facebook? Do you want to keep your friendships private and protect your personal information? Look no further, because this article will guide you on how to make your friends list private on Facebook. With just a few simple steps, you can control who has access to your list of friends. By understanding Facebook’s privacy settings, you will be able to adjust the visibility of your friends list.

    Whether you want to hide it completely or customize who can see it, we’ve got you covered. Additionally, we will provide tips on managing friend requests and suggestions, as well as other ways to protect your privacy on Facebook.

    So, let’s get started and ensure your friends list remains confidential!

    Key Takeaways

    • Access the ‘Settings’ tab on your Facebook profile to make friends list private
    • Choose between options like ‘Public,’ ‘Friends,’ or ‘Only Me’ to adjust visibility
    • Take control of your social circle by adjusting privacy settings for friends list
    • Manage friend requests and suggestions to curate your social circle

    Understanding Facebook Privacy Settings

    Let’s dive into the world of Facebook privacy settings and figure out how to keep your friends list private! Understanding Facebook privacy settings is crucial to maintaining your online privacy.

    To make your friends list private, start by accessing the ‘Settings’ tab on your Facebook profile. From there, click on the ‘Privacy’ option.

    You will see a section called ‘Who can see your friends list?’ Here, you can choose between different options such as ‘Public,’ ‘Friends,’ or ‘Only Me.’

    Selecting ‘Friends’ ensures that only your confirmed friends can see your friends list. If you want to make it even more private, you can choose ‘Only Me,’ and your friends list will be visible to you alone.

    By adjusting your privacy settings, you can have full control over who can access your friends list on Facebook.

    Accessing Your Friends List

    To keep your connections more personal and secure, you can easily check who’s in your social circle by accessing your buddies’ info.

    First, open Facebook and log into your account. Once you’re in, click on your profile picture in the top right corner of the page. This will take you to your profile.

    Next, locate the ‘Friends’ tab below your cover photo and click on it. Here, you’ll see a list of all your friends.

    To make your friends list private, click on the pencil icon next to the ‘Friends’ button. A drop-down menu will appear, and you can select ‘Edit Privacy.’

    From there, you can choose who can see your friends list by adjusting the audience settings. Keep in mind that this will only affect who can see your friends list, not who can see the posts and activity of your friends.

    Adjusting Privacy Settings for Your Friends List

    Once you’re logged into your account, take control of your social circle by adjusting who can see your friends list on Facebook. To make your friends list private, follow these simple steps.

    First, go to your profile page by clicking on your name at the top right corner of the screen. Then, click on the ‘Friends’ tab below your cover photo.

    Next, click on the pencil icon at the top right corner of the friends list section. From the drop-down menu, select ‘Edit Privacy.’ A new window will appear where you can choose who can see your friends list.

    You can choose to make it visible to ‘Only Me’ or customize it by selecting specific friends or friend lists. Once you’ve made your selection, click ‘Done’ to save your changes.

    Now, your friends list will be private and only visible to the people you’ve chosen.

    Customizing Who Can See Your Friends List

    Take control of your social circle and personalize who can see your connections on the popular social media platform. Facebook allows you to customize who can see your friends list, giving you the power to keep it private.

    To do this, go to your profile and click on the ‘Friends’ tab. Then, click on the pencil icon and select ‘Edit Privacy.’ A drop-down menu will appear, where you can choose who can see your friends list. You can choose options such as ‘Only Me’ to keep it completely private, or you can select specific lists or individuals who can view it.

    Remember, by customizing your friends list privacy settings, you can ensure that only the people you want to see your connections have access to it.

    Managing Friend Requests and Suggestions

    Managing your friend requests and suggestions allows you to curate your social circle on the popular social media platform. To start, go to the top right corner of your Facebook home page and click on the icon that looks like two people. This will take you to your friend requests page, where you can see any pending friend requests you’ve received.

    From here, you can accept or decline requests, as well as view and respond to any friend suggestions that Facebook has provided. If you want to manage your friend suggestions, click on the ‘See More’ button at the bottom of the suggestions list. You can then choose to add or ignore the suggested friends.

    By actively managing your friend requests and suggestions, you can ensure that your Facebook friends list remains private and tailored to your preferences.

    Additional Tips for Protecting Your Privacy on Facebook

    Now that you’ve learned how to manage friend requests and suggestions on Facebook, let’s dive into some additional tips to further protect your privacy.

    It’s crucial to make sure your personal information stays secure. One effective way to do this is by adjusting your privacy settings to make your friends list private. By doing so, you can control who can see the people you’re connected with on the platform. This is especially important if you want to keep your network discreet or limit access to certain individuals.

    To make your friends list private, simply go to your profile settings, click on ‘Friends and Followers,’ and select the option to hide your friends list from the public. Remember, taking these extra precautions will give you peace of mind and ensure that your online connections remain within your control.

    Frequently Asked Questions

    How do I change the privacy settings for individual friends on my friends list?

    To change privacy settings for individual friends on your Facebook friends list, go to your profile, click on the “Friends” tab, hover over a friend’s name, click on the pencil icon, and choose the desired privacy setting.

    Can I prevent my friends from seeing the friends I have in common with them?

    Yes, you can prevent your friends from seeing the mutual friends you have with them. Simply go to your profile, click on “Friends” and select “Edit Privacy.” From there, choose “Only Me” under the “Who can see your friends list?” option.

    Is it possible to hide my friends list from specific people on Facebook?

    Yes, you can hide your friends list from specific people on Facebook. Simply go to your privacy settings and select “Friends” under “Who can see your friends list?” Then, customise it to exclude those specific people.

    How can I prevent my friends list from appearing in search engine results?

    To prevent your friends list from appearing in search engine results, go to your Facebook privacy settings. Adjust the privacy level of your friends list to “Only Me.” This way, your list will be hidden from search engines and only visible to you.

    Can I control who can send me friend requests on Facebook?

    Yes, you can control who can send you friend requests on Facebook. Simply go to your privacy settings, select “Who can send you friend requests?” and choose the option that suits your preferences.

    Conclusion

    So there you have it! By following these simple steps, you can easily make your friends list private on Facebook.

    Remember to regularly check and adjust your privacy settings to ensure that your personal information is protected.

    Don’t forget to manage your friend requests and suggestions as well. By taking these extra precautions, you can have peace of mind knowing that your privacy is safeguarded while still enjoying the benefits of social networking on Facebook.

  • How To Make Flower Pot Minecraft: Creativity With Easy Crafting Guide

    How To Make Flower Pot Minecraft: Creativity With Easy Crafting Guide

    Are you ready to unleash your creativity in the world of Minecraft? With this easy crafting guide, you’ll learn how to make a flower pot and create your own virtual garden.

    Gather the required materials, craft the clay pot, and start hunting for the perfect flowers to fill it with. In this article, we’ll show you step-by-step how to bring your virtual garden to life.

    Once you’ve mastered the basics, you can let your imagination run wild and decorate your garden in unique and exciting ways. Show off your creativity by building an enchanting oasis, a vibrant floral display, or even a mini jungle.

    The possibilities are endless, so grab your pickaxe and get ready to become a master of Minecraft gardening!

    Key Takeaways

    • Crafting a flower pot in Minecraft requires 3 bricks, a flower, and a crafting table.
    • Decorative touches can be added to the clay pot by right-clicking on it with a flower or plant.
    • Flowers can be collected in various biomes by right-clicking on them.
    • Players can create beautiful flower arrangements by experimenting with different colors and types of flowers and placing them in the clay pot.

    Gathering the Required Materials

    Now that we’ve got our green thumbs ready, let’s gather all the materials we need to create a stunning flower pot in Minecraft!

    The first thing you’ll need is three bricks. You can easily find bricks by smelting clay in a furnace, which can be made by placing clay blocks in a crafting table.

    Next, you’ll need a flower. There are various types of flowers in Minecraft, so choose your favorite! You can find them in grassy areas or even in flower forests.

    Finally, you’ll need a crafting table. To make one, simply gather four wooden planks and place them in a 2×2 square on your crafting table.

    Once you have all these materials, you’re ready to move on to the next step and start crafting your flower pot!

    Crafting the Clay Pot

    First, we’ll need to form the clay into a pot shape. Start by gathering a block of clay and placing it in your crafting table. Arrange the clay in a ‘U’ shape, leaving the middle slot empty. This will create a clay pot.

    Once you’ve crafted the clay pot, it’s time to add some decorative touches. You can use different types of flowers or plants to add color and variety to your pot. Simply right-click on the clay pot with the flower or plant in your hand, and it will automatically be placed inside.

    You can also place the clay pot on a block or surface to display it in your Minecraft world. Enjoy your newly crafted flower pot and show off your creativity with this easy crafting guide!

    Finding and Collecting Flowers

    Once you’ve gathered different types of flowers, it’s time to start collecting them for your clay pot.

    Look around your Minecraft world, keeping an eye out for brightly colored blooms. Flowers can be found in various biomes, including plains, forests, and even in flower forests. Approach the flowers and right-click on them to collect them. Each time you collect a flower, it will go into your inventory.

    To make your flower pot more visually appealing, try to collect a variety of flowers. You can mix and match different colors and types to create a beautiful arrangement. Don’t forget to explore different biomes to find rare and unique flowers.

    Once you have a good collection, you’ll be ready to move on to the next step in creating your flower pot.

    Placing Flowers in the Pot

    To place the flowers in your clay pot, all you need to do is simply right-click on the pot with the flowers in your inventory.

    Once you have selected the pot, position your cursor over the desired spot where you want to place the flower. With a quick click, the flower will magically appear inside the pot. It’s as easy as that!

    You can mix and match different types of flowers in the same pot to create a vibrant and colorful display. Don’t be afraid to experiment and get creative with your flower arrangements.

    Remember, the more flowers you add, the more beautiful your pot will look. So go ahead and start decorating your Minecraft world with these lovely flower pots!

    Decorating Your Virtual Garden

    Get ready to bring your virtual garden to life by adding your unique touch and personal style. Decorating your virtual garden is all about expressing your creativity and making it a space that reflects your personality.

    Start by choosing a theme for your garden, whether it’s a peaceful oasis with flowing waterfalls or a vibrant flower paradise. Use different types of flower pots to create variety and interest in your garden. Experiment with different colors and patterns to make each pot stand out.

    Consider adding other decorations like fences, pathways, and even statues to enhance the overall look of your garden. Don’t be afraid to mix and match different elements to create a truly one-of-a-kind virtual garden that you can be proud of.

    Showcasing Your Creativity

    Now that you’ve beautifully decorated your virtual garden in Minecraft, it’s time to showcase your creativity to the world!

    The current subtopic focuses on how to make the most of your creations and truly impress others with your talent. Showcasing your creativity is all about finding the perfect angles and lighting to capture the essence of your virtual garden.

    Take advantage of the game’s built-in camera features to snap stunning screenshots or record captivating videos. Experiment with different perspectives and camera settings to highlight the intricate details and vibrant colors of your flower pots.

    Share your masterpieces on social media or upload them to Minecraft communities for others to admire and draw inspiration from. Don’t be afraid to let your creativity shine and inspire others in the Minecraft universe!

    Frequently Asked Questions

    Can I use any type of clay to make the flower pot in Minecraft?

    Yes, you can use any type of clay to make a flower pot in Minecraft. Simply gather the clay of your choice and craft it into a flower pot using the specified crafting recipe.

    How many flowers can I place in a single flower pot?

    You can place one flower in a single flower pot in Minecraft. It’s a great way to add some decorative elements to your builds and bring a touch of nature to your virtual world.

    Can I use the flower pot for other decorative purposes besides holding flowers?

    Yes, you can definitely use the flower pot for other decorative purposes besides holding flowers. It can be used to display small plants, herbs, or even as a cute little container for small trinkets.

    How do I prevent my flowers from wilting or dying in the flower pot?

    To prevent your flowers from wilting or dying in the flower pot, make sure to water them regularly. Check the soil moisture level by sticking your finger in it. If it feels dry, give the plants a good watering.

    Can I customize the color or design of the flower pot in Minecraft?

    Yes, you can customize the color or design of the flower pot in Minecraft! Use different types of clay to change the pot’s color, and add decorative items like dyes or patterns to make it unique.

    Conclusion

    In conclusion, making a flower pot in Minecraft is a fun and creative way to express yourself. By gathering the required materials and following the crafting guide, you can easily create a clay pot.

    Once you have your pot, it’s time to find and collect beautiful flowers to place inside. Don’t forget to add your own personal touch by decorating your virtual garden.

    So go ahead, let your creativity bloom and showcase your masterpiece to the Minecraft community!